
Now that we’ve discussed many of the important formatting tools in MS Word, let’s turn our attention to collaboration. In the first post of this series, Back to the Basics, we explored the highly collaborative environment of eLearning.
After adding hyperlinks, page breaks, tables, and photos, it’s time to share your material with your fellow collaborators. And, using MS Word’s Review tab, you can work with them to discuss, edit, and update your document.
Let’s take a look at this Review Tab, our Collaboration Station™.
The two most useful tools in the Review tab are Track Changes and Comments.
Track Changes
When you start collaborating, you’ll want to turn on Track Changes to show your suggestions. Clicking the Track Changes button turns it on or off.

Once you select the button, MS Word records all of your revisions, changing the color for each collaborator (e.g., mine are in red, a coworker may be yellow, another coworker may be orange, etc.).
Here is an example of how track changes look with the revisions inline.

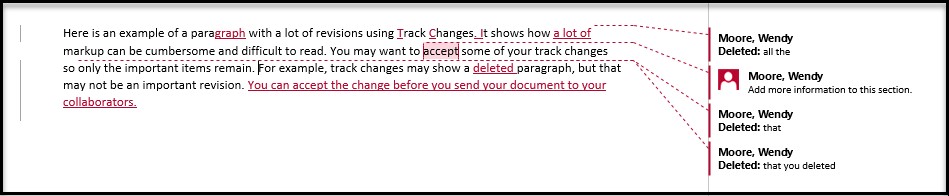
And, here is an example of how track changes look using balloons.

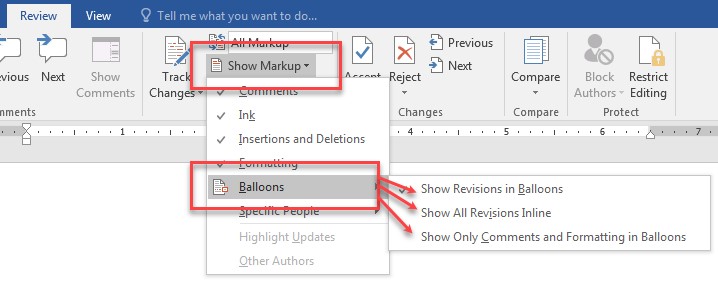
You can change how you view track changes by going to Show Markup > Balloons.
Comments
The Review tab also allows you to select text and make a comment.

Comments appear in balloons to right of your document. Like our track changes above, comments by each collaborator automatically appear in different colors (e.g., my track changes are in red and my comments are in a red box).

The name of the author automatically appears at the top of the comment. So, it’s easy to collaborate with multiple people. And, collaborators can also reply to other comments.

Making a comment is a great collaboration option if you need to discuss a revision before actually doing it.
Cleaning Up the Track Change Mess
If your document needs extensive revisions, you may notice that it can get a bit messy. Let’s take a look at an example.
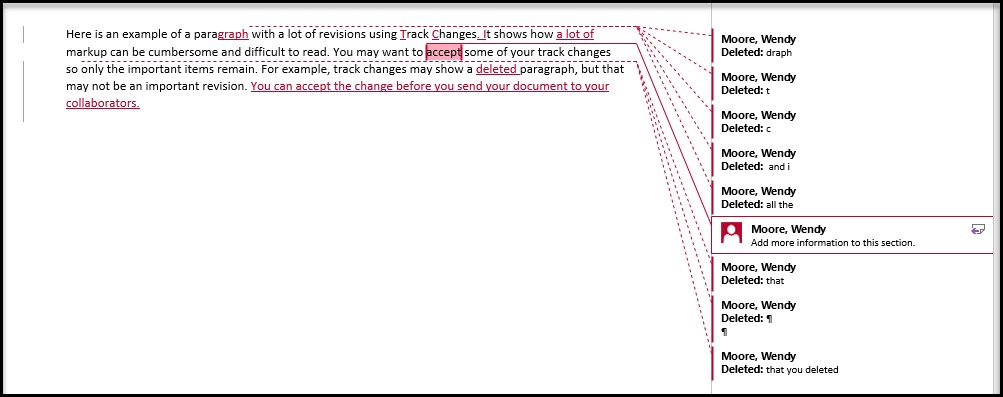
It’s difficult to see the important changes in the text and the comment gets lost in the track change balloons. I found that it is very helpful to eliminate some of the balloons by accepting some of the track changes and deleting extra comments.
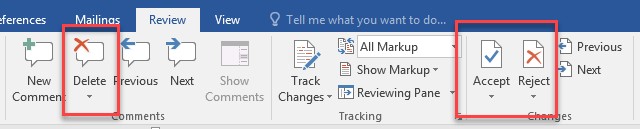
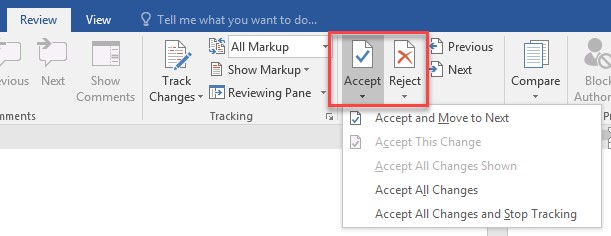
You can accept/reject track changes and delete comments two ways.
First, you can select the track change or comment balloon and select Accept/Reject in the Review tab or Delete if you’re deleting a comment.
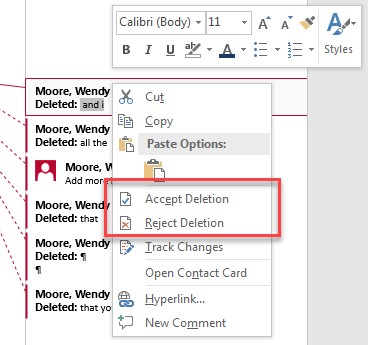
Second, you can right-click (PC) or CMD + Click (Mac) on the track change or comment balloon and make your selection there.
So, here’s what our paragraph looks like now that we’ve cleaned it up a bit.
View Simple Markup
Another quick option to see your document in a simple form is to view using Simple Markup in the Review tab.
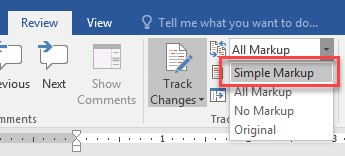
This mode is a quick way to view a clean version without any markup. The red lines to the left of the paragraph indicate unseen revisions in this paragraph.

Note that the Simple Markup version only shows the finished, revised text. And, you’ll need to hover over each comment to see its reference.
Sharing for Collaboration
If you are collaborating with more than one person, emailing a document can end up creating multiple versions with different revisions and comments. It may also be difficult to get all the Track Changes and Comments back into one document.
Cloud storage solutions like Box, Dropbox, and Google Drive allow you to share a folder or document and edit in real time. It streamlines the editing processes by collecting all Track Changes and Comments in one document.
And, just a quick reminder that Google Drive is a platform where you can share MS Word documents, but Google Docs is a word processor—two completely different technologies. Using Google Docs is another topic for another series.
The Finished Document
Now that we’ve made all of our revisions, how do we get a finished document without all the markup? I am going to suggest three options:
If you need to keep a record of your Track Changes and Comments:
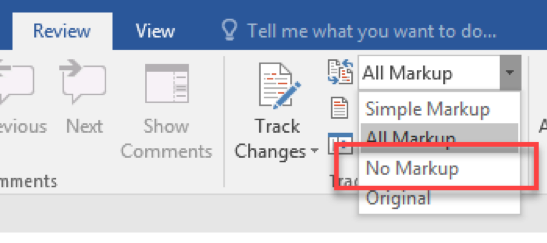
You can turn off Track Changes by going to the Review tab and selecting No Markup.
Then, you can do one of two options.
- Option 1: Save as a PDF. If you selected No Markup, your new PDF will not show any Track Changes or Comments.
- Option 2: Save as a new Word document. You will need to accept all track changes and delete all comments. See Option 3 below for more on how to do this.
If you do not need a record of your Track Changes and Comments:
You can simply accept all track changes and delete all comments.
- Option 3: Save a clean version. To accept or reject your track changes, go to the Review tab. You can accept/reject each change individually, or you can accept/reject all. To delete your comments, do as we did when we cleaned up the track change mess earlier in this post. This time, get rid of all comments.
Formatting and collaborating on eLearning documents can be a developmental nightmare. But, learning how to utilize Track Changes and Comments can streamline this collaboration process and keep all parties on the same page (literally).
How have you used track changes in your eLearning collaboration? Let us know!
