
You’ve recorded your lecture or instructional video, and now you need to edit it into something you can share with your students. With the complex elements and tools involved, the process to convert a simple recording into a full-fledged video can seem intimidating or daunting. While the technical side of editing can be very complicated, it’s a very simple and straightforward process.
Today, I’m going to walk you through the basics of video editing. Whether you’re learning editing for yourself or just interested in understanding the process, this post will give you an overview some of the elements of video editing basics. I’ll use Adobe Premiere Pro as our example, but video editing software like Camtasia, Final Cut Pro, and DaVinci Resolve have similar features. So, without any further ado, let’s begin!
Importing Media
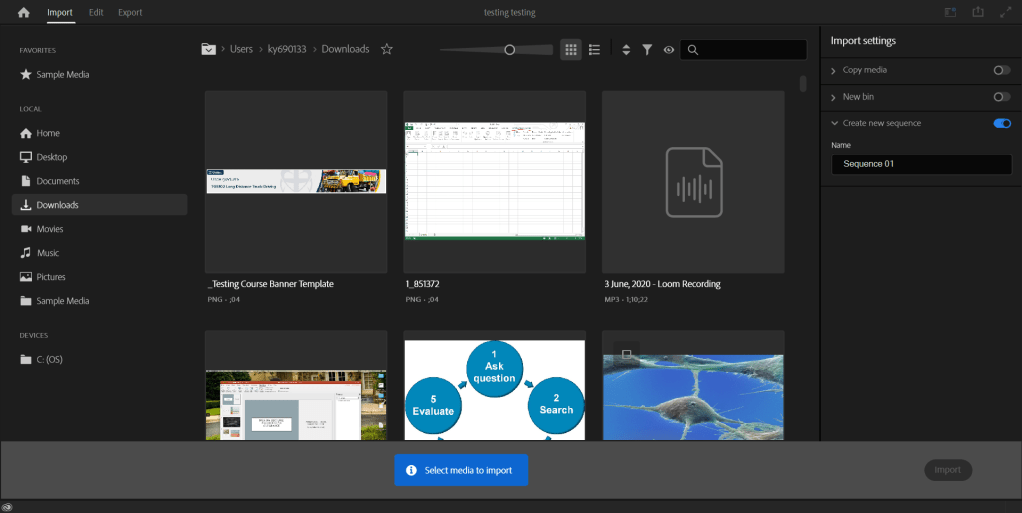
You can’t make any edits without a video to edit. You’ll need to gather all the different media sources to put into your video. This can include any recordings (both video and audio), music and various sound effects, images, graphics, PowerPoint slides, etc. Remember to consider copyright when you gather your resources—either seek permissions or use royalty-free materials (or those in the public domain). Most editing software will have an “import” function, which allows you to grab these elements from the files in your computer. Premiere Pro even gives you the option to choose the files you want to use before you start a project.
It’s important to save everything you want to use for the project together so you can easily find them when you start editing. I’ve always found putting them into a folder helps. Once you have all the files you need, then the editing can begin.
Cutting and Splicing
When talking about movies or film, you may have heard the term “cut” or “cutting” before. A cut is simply a transition from one visual element to another—either camera angle or image. The cut literally refers to the cut you make to a video file to achieve this transition. Once the video file is in the program, you can make cuts and edits where you see fit. Depending on the software, you’ll have a “cutting tool” or a “razor tool”. Then you need to find the part of the file you want to cut and make a cut with the tool. For example, you could cut out a section of a lecture you feel isn’t needed, or any verbal slips (such as ahs, ums, or unrelated tangents) you may have made.
Once you’ve made your cuts, you delete any unnecessary material and drag your cuts together to form a connected file. You can do more complex actions and very precise edits with cutting tools, but for our purposes, cuts are very simple deletions of things we don’t need in our video.
Checking Audio Levels
While videos are visual in appearance, audio plays an important role to the finished product. In editing, audio is a balancing act. You don’t want the sound to be too loud or quiet. Thankfully, most editing software comes with an audio level bar that gives you a good idea of your sound levels. Using this allows you to balance out the audio and get it into the Goldilocks range of being “just right”. The best way to do this without having to get into the complex sound mixing tools is to adjust the volume level of each audio file. For example, if you’re editing a lecture, you’ll want to hear the speaker’s voice clearly over any background music you’ve added.
In Premiere Pro, you can use the effects taskbar to adjust the volume level or use the audio level tool that appears in the clip itself. Moving the line down lowers the volume level of the music—allowing the speaker to be heard more clearly. If the speaker is too soft, you can increase their volume a bit. Remember, if you adjust the volume, you should review the audio level bar. If you’re in the red zone, you’ll want to lower the volume. There’s plenty more to know about mixing sound and audio effects, but it’s important to keep your audio balanced.
Exporting The Video
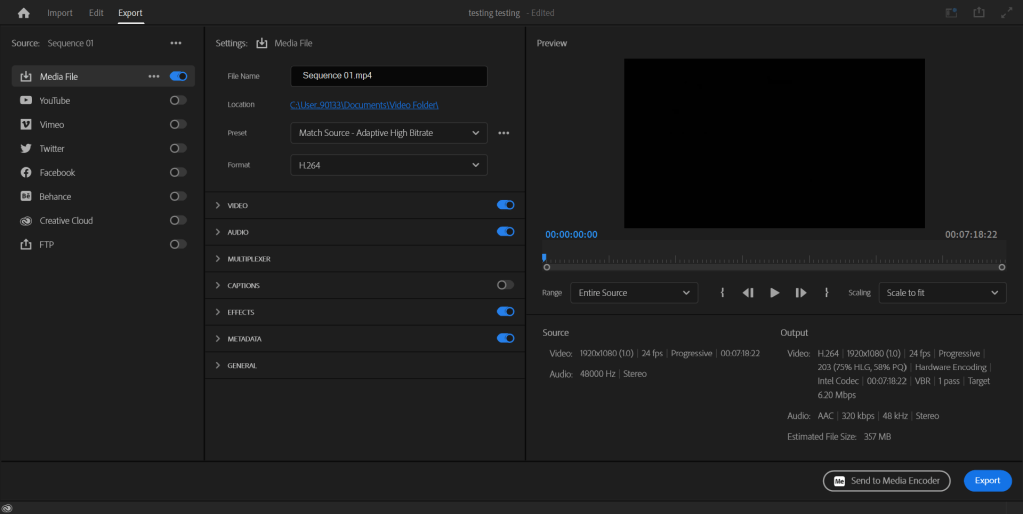
Once you’re pleased with your edits, it’s time to finalize the product. Editing software includes a function called “export” to save the finished video in a format so you can share it with others. In Premiere Pro’s export menu, the software will ask you to name your file and choose where you would like it to be uploaded to in your computer. This is where you choose the file type. For the sake of simplicity, I recommend choosing H.264—a basic mp4 format.
Once you’re all set, select the Export button. This process will take a while, as the software renders the video into a file. This is the part where you can give yourself a pat on the back for a job well done.
Once fully rendered, you can review the file. Voila! You have a video!
Final Thoughts
As mentioned earlier, video editing software includes complex editing tools such as advanced audio mixing options and detailed color grading. I hope through the course of this post that I’ve shown that video editing, at its heart, is not as complicated as it may seem, and that I’ve given you a better understanding of the basics that go into creating a video. Whether we’re creating and maintaining instructional videos or engaging learners with interactive video, we should know what makes a good informational video—but we must understand the tools to create the videos too. In the future, I’ll follow up with a more detailed look at video editing for instructional media.

2 thoughts on “The Basics of Video Editing”